Design of the ASCII Art
Authors: Flosha & Avallach
Created:: 2021-10-01
Flosha: After the creation of the latest design of our team website, in which I decided to discard all images in favour of pure text and ASCII art, I told Avallach that I want to colourise the Phoenix that I had designed in 2016 and decided to use the newer “stalker” variant I had made in 2021. While the design of gothicarchive.org, phoenixthegame.com and our documentation was developed by me on my own, there are a few technical things that I couldn’t manage to do myself. The colouration of the ASCII art is one of them, and I thought that the solution is interesting enough to tell you about.
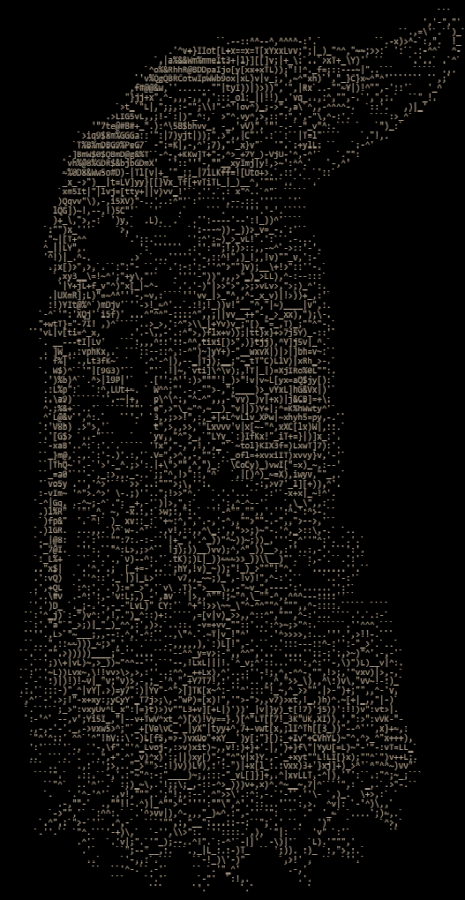
I generated the Phoenix ASCII with an online tool, since I couldn’t see me doing that by hand. This uncolourised version was looking like this:
For everything else I will just quote our conversation. No need to retell what you can read first hand (or first fingertips in that case). I was just finishing the design, showing it to Avallach and asking if he would be able to help me with the colouration.
[23.09.] Flosha: What do you say now?
I want to add colour to the Phoenix. It’s just quite hard to do.
[23.09.] Avallach: O wow, I really like it. I really like the ASCII art design of the main page. I can help colouring.
… he said. And went straight to work. Two days later:
[25.09.] Avallach: This is harder than I thought. I have an idea how to achieve it, but it will take me a bit more time. / I will need to separate the ASCII art into multiple layers, each for one colour in the palette. So there will be 4-16 <pre> elements overlayed on top of each other with CSS.
[26.09. 00:37] Avallach: It’s really hard. This is a prototype with 6 layers, colours are not set yet. But I see that shape somehow got corrupted.
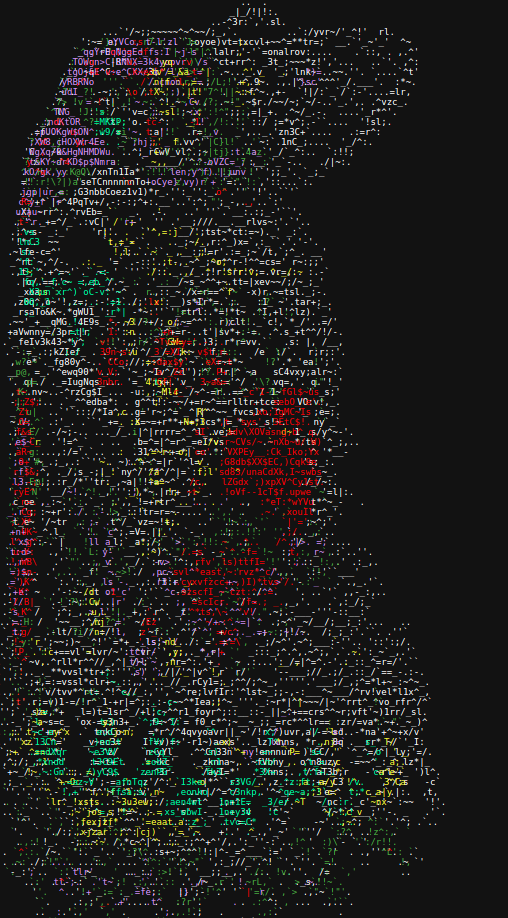
[26.09. 00:50] Avallach: I fixed the shape, but contrast and colours still require some work. / Still 6 layers. Gray + 5 colours. / Do you think this is enough colours or should there be more, like 16?
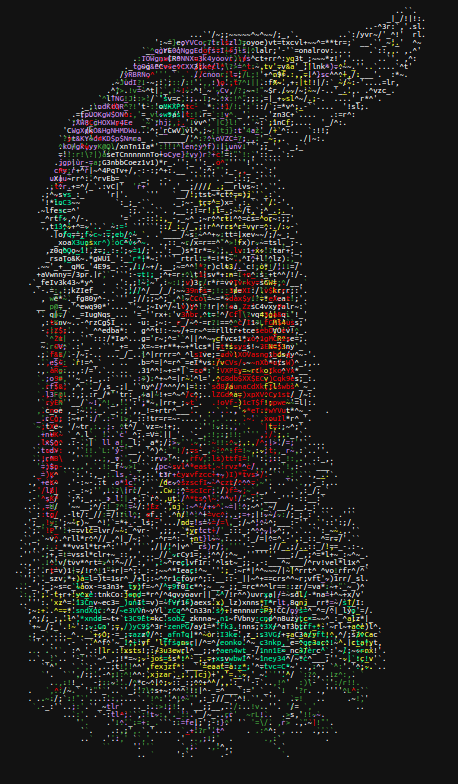
[26.09. 12:29] Avallach: I’m doing already like the 4th prototype… this time trying to limit colour to areas with some minimum saturation and brightness on the input image:
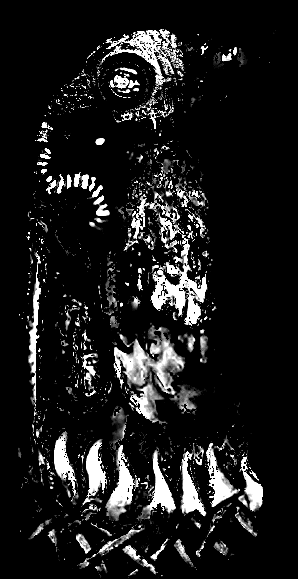
[26.09. 12:35] Avallach: Current idea: Pick the optimal colours only for these sections of the image, and leave the rest in greyscale:
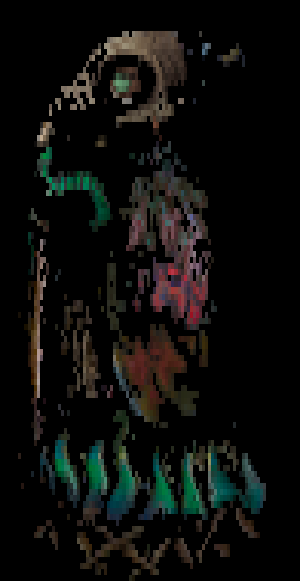
[26.09. 13:54] Avallach: I need gimp to calculate optimal colours. / But it is already on the same grid. / 98x95 / As the ASCII will be. / So that the calculations for each character are exact. This is around 10 colours and IMO looks close enough.
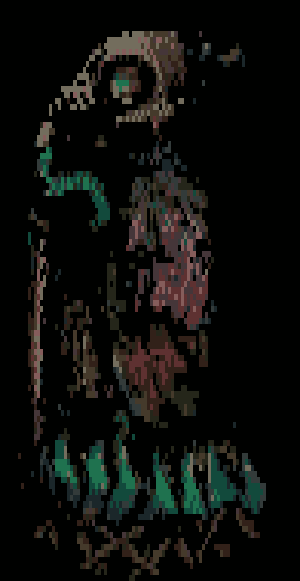
[26.09. 14:02] Avallach: All the brightness and sharpness will be handled by the ASCII art generator. This is just a template how to separate colours into layers. All the brightness information from here will be ignored.
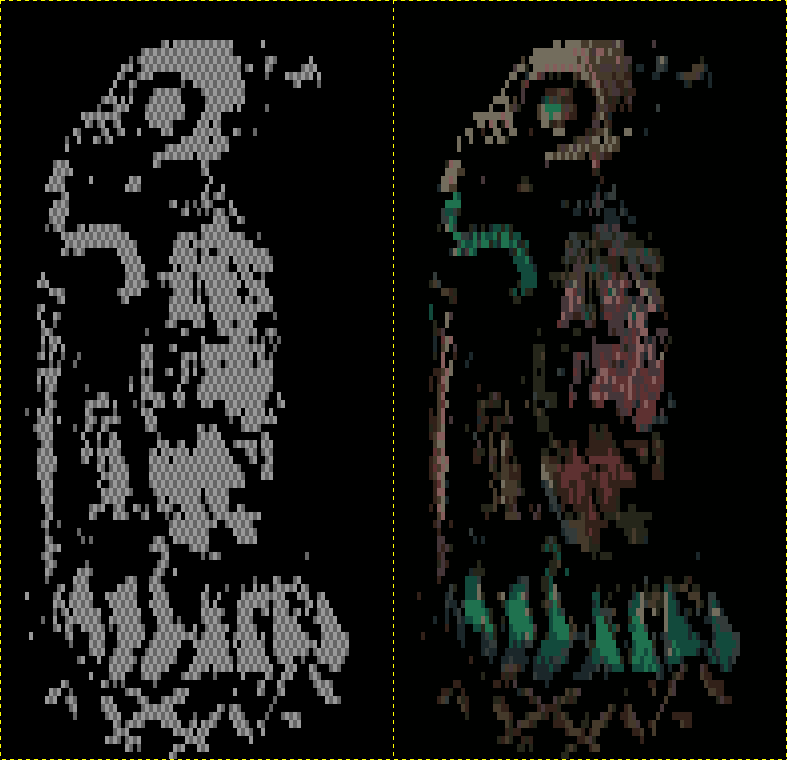
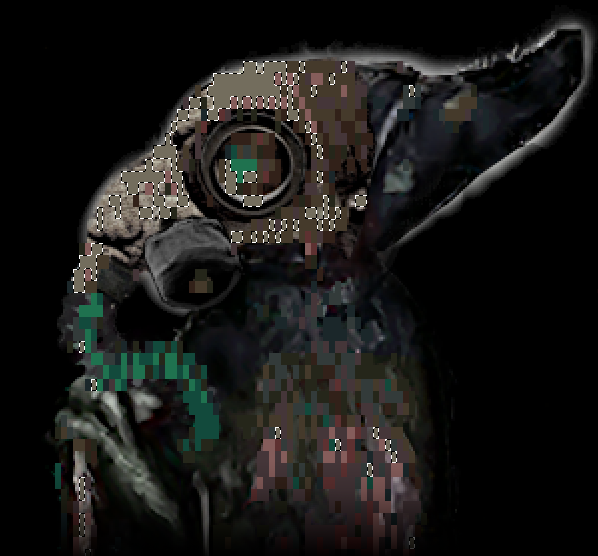
[26.09. 15:07] Avallach: This is the result of the separation:

Avallach: Now I will prepare the ASCII-art [again, via the online generator I (flosha) used] from each of these colour layers. / I think only this screenshot really explains how it works, right?
Upon my request, Avallach has written a little documentation, that really shows the complicated process he came up with just to fullfill my wish to colourise the Phoenix:
How Phoenix Tales colours ASCII arts
by Avallach
Just like with making a mod for the zEngine, it’s a tedious and manual process involving multiple tools. Could be made way easier if we were ok with cheating and making a bitmap picture where characters are represented as pixels. But no, we want a real old-school ascii art that is both retro and lightweight.
We used a third party tool that can convert a grayscale image into ascii art. It does not matter which tool it is, the approach works with any.
We came up with this exact procedure when preparing a coloured ascii art of the Phoenix in the “Stalker” variant. We tried out a few different approaches, and the below sequence of steps gave the best results.
Step 1 - prepare colour mask
- Duplicate the input image into new layer “1”
- Create new layer “2” filled with 50% saturated red (HSV)
- Put “1” above “2” and set colour mixing mode to HSV saturation
- Merge layers “1” and “2” into “2”
- Desaturate and invert layer “2”
- Duplicate the input image into new layer “3”
- Desaturate layer “3”
- Increase contrast of layer “3” to maximum and set brightness to the point when parts too dark to be coloured are all black
- Put layer “3” above layer “2” and set colour mixing mode to “Darken only”
- Increase contrast of layer “2” to maximum and set brightness to the point when only parts with visible colour are white
- Merge layers “3” and “2” into “2”
- Scale layer “2” to the size of target ASCII art in characters (e.g. 98px x 95px for Phoenix mascot) (proportions will appear stretched horizontally, because each character in rendered ascii art is naturally taller than wide)
- Replace white with transparency
- The layer “2” is now our “colour mask” that we will use in the next step
Step 2 - prepare colour map
- Slightly increase saturation of input image to compensate for coming partial colour loss
- Scale input image to the size of target ASCII art in characters
- Put “colour mask” prepared in step 1 above input image and merge it into it
- Make sure that there is only one layer left in the image and no transparency
- Change image mode to indexed, around 10 colours, with Floyd-Steinberg dithering
- Replace black with transparency
- The colour map is ready - we will use it for distributing available colours between “ascii pixels” (it will only affect hue/saturation, not brightness as expressed by choice of different ascii characters)
Step 3 - separate layers on input image
- Put colour map prepared in step 2 on top of input image
- Use tool “select by colour”
shift-oall the time, with 0% tolerance setting and no antialiasing - Scale colour map to image size, with no interpolation (it will look “pixelated”)
- Select black colour on colour map and remove it
- Select any colour on colour map, delete that selection on colour map, then cut that selection from input image and paste it as new layer
- Repeat step 5 until colour map is completely empty
- Save each layer created in repeats of step 5 as separate file
- Generate separate ascii art from each of these files, using a 3rd party tool of your choice
- Generate last ASCII art from parts of input image that were not covered by colour map
Step 4 - assemble with CSS
- Display each ASCII art in separate divs
- Position the divs absolutely on the same position, so that they perfectly overlap
- Pick different colour for each ASCII art, except of the last one, which contains “grayscale” part
- Carefully tweak the colours in CSS so that overall the art has the best reassemblance to the input image
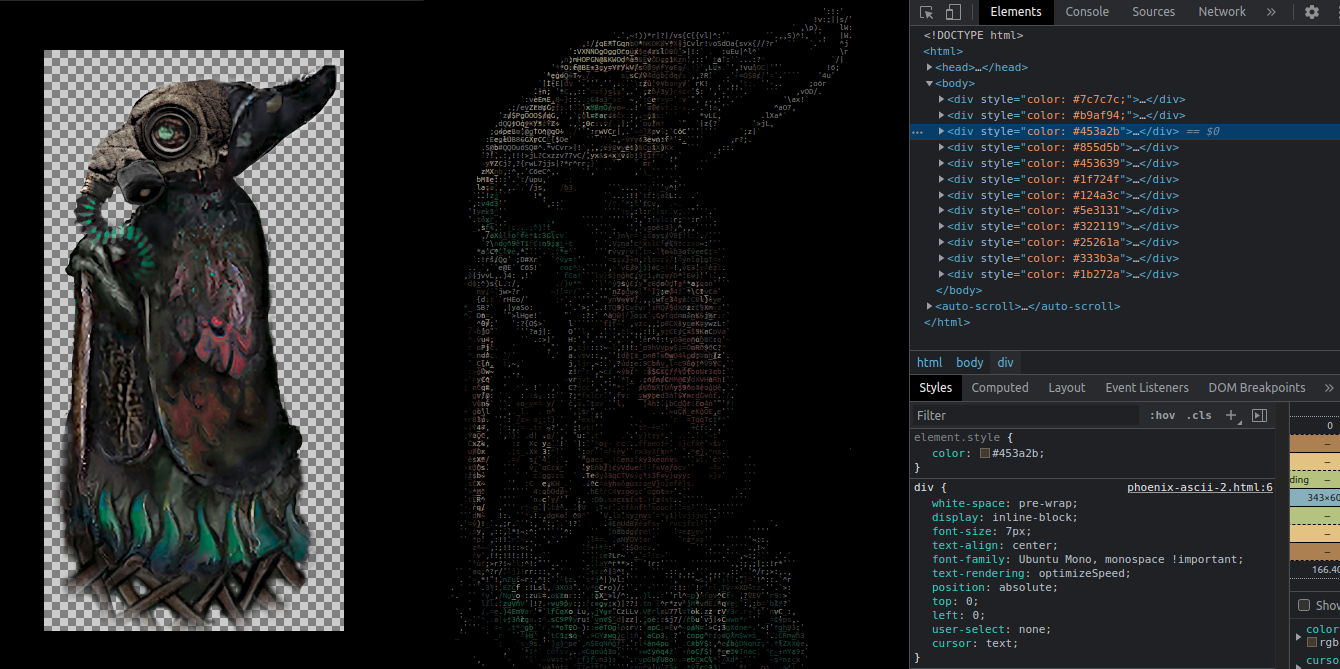
Here our final colourised Phoenix:
And for your imagination: These are all the signs of the 12 layers if we do not let them overlap and do not put them in a <pre> tag:
Avallach put the colourised ASCII into a .svg in order to prevent having all that code on our page. But if you want to see how the final 12 layers look like, just rightclick and take a look at the sourcecode.
                      ,.
                     ,aBV
                     ,wgm`
                     ')]gQv
                    ;+9Qga'
                    ^tBQgB_
                     `y@gQL                                        `
  :                   ']QQK'                       ;+.       `)L^'
   ._:`      `.'^,_w)`:)lQgQ&$pL`     `,,-.       `x).          ,j+,`      `.              .:
   xV+h_^7jG#BB@&%d^.,.'GgggQQBJ   `7$&@g@G|    `+V`          `[R[Ll>`     >'   "x^     '+bv
    |l&%xjb["""XgG:     Jggg&%QD-  vQQ@IDggB,  .+l-           _RG)`,aU!    )+`  `LRh_:'xGp,
    |mPQQQQd.'IQ8-      +gQB_|@$,  agQj`vggQ_ ^CU_^^,__)_-   .wmv   ,fd-   _X^    '=#0#BD"
   `  _9QgggQvXgB_       "B@x ,&Q_  KggC)0gg@" _DRx:,,^'`     +K,     ;a,   ^fL`     ,mB&&R+.
     _hp@QggQQBJ`        ``  :DQ|  _Qggggg&x`  =5mx         ^a"      :I_   .)>      I#y'"wmD7'
        ,xBgggX'             ,&Qx   ,ybRhx-  ')7)v]`        ,L.       L[.   )|`    La"   `^_lPv'
          `;aBggm,            )BB_            ';|" -_.             `   `J,   '7,`   ``      .`._x!
            Vggg&)           LBd'             -"_ .`'.       `,^.^,`   `.'  `_-`
          "PmQggg&"         .jBPIL           '^    -,'`  .`  -y"'.v: `   ,:                 ..
           `w8gQhQgm`        _0&j"            ``     ,=" .'`,""'  "L``'.``   `.               .'
         `JB@QQbGgQ_       :5@D)                   _)|L>.-,'''   -^,-C'`. `   `
          :yBgQ@QgQ>      .y$QX`                "^ |xv7_^'>.````-;__")`:, ``
          .)Bgggggj     `>!+&%"        ,>_)v=,-,|L__!)7t)+v``:,.:fPf-  `:'`        .:
            `_9QDQ&^   ```',C#_        ')_V7Jj];`. '``.,]mIV>   'bGBb   ._.-"^  ` `;_
             LG&g0L   ^:,,vd9:             `+bLv;..` ^+Vdb9].` _twDb' ^yVx7__":.`LdU7)`
              [QDX9`  `' `x@X`              _mPy:   :hRll+Cmh+^  .Kx  ;fxL_' `   ,Kabmw.
            'f@BK_,    .:.)@J               "GX.   ^P7;^)v"|bL>' `a+``'|!v_">'  `]jIIf7-.
           `x@DL'`;)     ``)@)              `_%Gh>  >:','`.':"+IhL :+.  "_,!!``'v;!JK,`
          ,Bgw  `"^    ```^j,                t$I   ` `:`   `^',J).     !)+)!.`-v]UC"
           :&D'  .'.       '             `` .`xw!      `    `'`..       ,+++|)"_wjfv_:
          -0j             ;`               "'                `       .!vL);^'+lx".`.
          _Bj            `'               `,`                 `       .."'  )]_`
          .jy           `.:                                               `_+
           ;'            .`